

-
Products
-
2D Cutting

-
Tube Cutting
-
3D Cutting
-
BLT Intelligent Cutting
-
Industrial Automation
-
Industrial Software
-
-
Portfolio
-
-
2D Cutting Head
Tube Cutting Head
Plane Bevel Cutting Head
Structural Steel Cutting Head
-
BOCHU High-Speed Servo Drive
-
Popular products
-
- Online Store
- Service & Support
- About BOCHU
- Investors Relations


- Software Download
- Manual
- Tutorial
- CloudNest
Function Description
Batch import of nc1 files exported from Tekla through Excel, and allows mapping of quantity columns to generate corresponding parts in the parts list.Video Tutorial
-
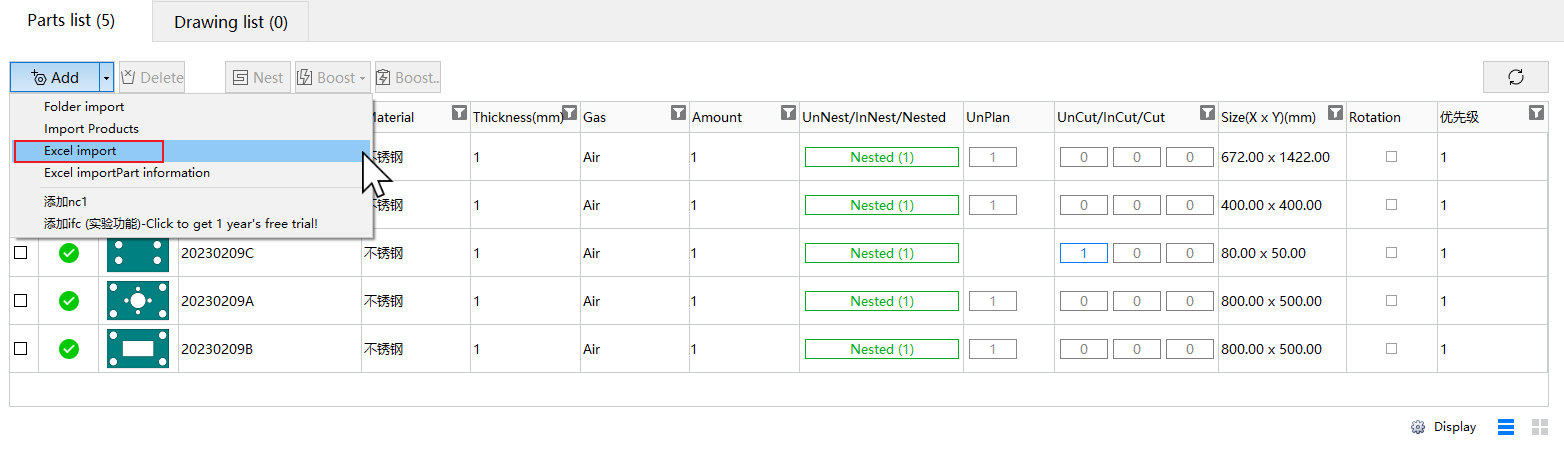
Click on “Add Part” and select “Import from Excel”
-
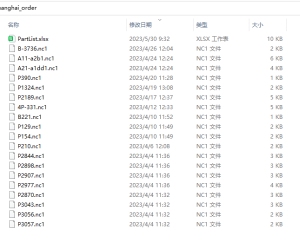
Select “Open Excel” and choose the Excel file to import.

- The Excel file needs to be in the same folder as the nc1 file.
-
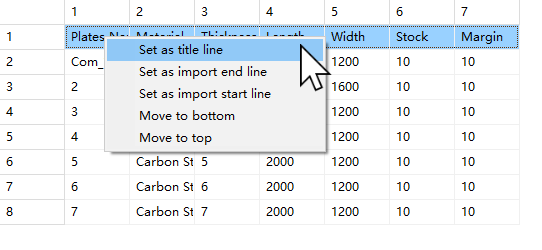
If the first row of the imported file is not the header row, you need to right-click and set it as “Header Row”. If the row immediately following the header row is not the start row, you also need to right-click and set it as “Import Start Row”. The same applies to the import end row. If the last row is not the end row, you need to right-click and set it as “Import End Row” . If the order of the table is correct, you can skip these settings.
-
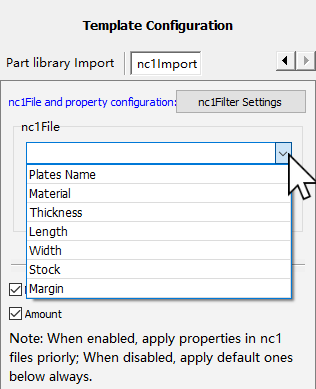
The information bar on the right side can be divided into “NC1 File and Property Configuration”, “Part Property Settings”, and “Basic Part Property Settings”.
1) Check the column name that corresponds to the name of the nc1 file in the drop-down box.
2) Choose “Relative Path” because the table file and nc1 file are in the same folder. Note: Definitions and explanations of absolute path and relative path
3) Select the part property settings according to your needs. When checked, the attributes in the nc1 file will be used first. When unchecked, the default attributes of the part will be used. If you want the part quantity to be set according to the Excel table, you can uncheck the quantity and set the part quantity through mapping in the basic part property settings below, as shown in the following figure.

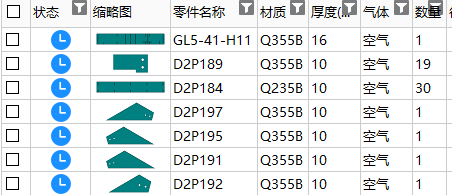
- After setting up these parameters, click “OK” to import the parts. You can see the imported parts in the parts list, along with their material, thickness, and quantity information.
Updated on 2023-05-30

Function Description
Batch import of nc1 files exported from Tekla through Excel, and allows mapping of quantity columns to generate corresponding parts in the parts list.Video Tutorial
-
Click on “Add Part” and select “Import from Excel”
-
Select “Open Excel” and choose the Excel file to import.
- The Excel file needs to be in the same folder as the nc1 file.
-
If the first row of the imported file is not the header row, you need to right-click and set it as “Header Row”. If the row immediately following the header row is not the start row, you also need to right-click and set it as “Import Start Row”. The same applies to the import end row. If the last row is not the end row, you need to right-click and set it as “Import End Row” . If the order of the table is correct, you can skip these settings.
-
The information bar on the right side can be divided into “NC1 File and Property Configuration”, “Part Property Settings”, and “Basic Part Property Settings”.
1) Check the column name that corresponds to the name of the nc1 file in the drop-down box.
2) Choose “Relative Path” because the table file and nc1 file are in the same folder. Note: Definitions and explanations of absolute path and relative path
3) Select the part property settings according to your needs. When checked, the attributes in the nc1 file will be used first. When unchecked, the default attributes of the part will be used. If you want the part quantity to be set according to the Excel table, you can uncheck the quantity and set the part quantity through mapping in the basic part property settings below, as shown in the following figure.
- After setting up these parameters, click “OK” to import the parts. You can see the imported parts in the parts list, along with their material, thickness, and quantity information.
Updated on 2023-05-30
-

Download
-

Contact us
-

Online consultation

